ECS Pattern: Decay

This blog post is based on Entity Component System are Crazy Cool.
There are so many things in-game that have a lifetime. Bullets, effects, debris, blood, vanishing tiles in a can’t stop running-game, and many more things which have a lifetime.
In the past, I would have done it separately depending on which situation something hast to vanish. With the entity component system you can solve all of them with one component and one system. The decay component and decay system.

I use jMonkeyEngine with Zay-ES written in Java.

Component

Bullets, debris, blood are represented by entities with a certain set of components in our game world. A bullet entity for example has a model component, a position component, and a damage component. For the decay system, we need a decay component we can attach to those entities to make them disappear after a while. Instead of detecting where the bullet is, you simply remove the bullet after a while if it didn’t hit something. No need to detect where the bullet is right now, just remove it after let’s say a second.

public class Decay implements EntityComponent {

    public long timeout;

    public Decay(long timeoutMs) {
        this.timeout = timeoutMs;
    }

    public long getTimeoutMs() {
        return timeout;
    }

    @Override
    public String toString() {
        return getClass().getSimpleName() + "[" + timeout + " ms" + "]";
    }
}

On creation, you define the timeout for the decay component. The timeout in ms does define how long the entity shall live.

System

The decay system does the calculation if the entity’s lifetime has been reached. It doesn’t matter if it is a bullet, an effect, debris, or even the space station. And that is the shiny beauty of an entity component system. You can give something a lifetime in your game at any time. You can decide to add a lifetime to something even very late in the development process. You can decide this a day before you launch the game as it is simply a one-liner by adding a decay component to that entity. No refactoring or code moving involved at all.

Skeleton

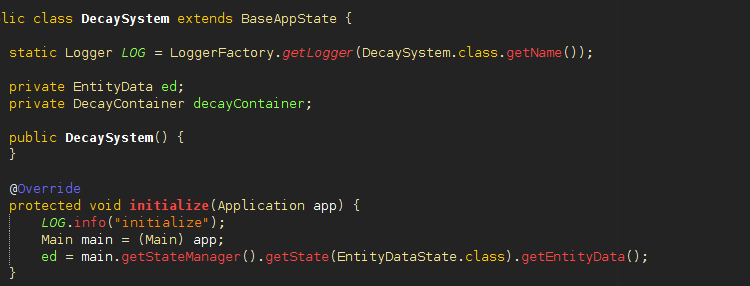
Let’s start with a very basic system and set up everything we need, like the entity data and the decay container.

public class DecaySystem extends BaseAppState {

    private EntityData ed;
    private DecayContainer decayContainer;

    public DecaySystem() {
    }

    @Override
    protected void initialize(Application app) {
        Main main = (Main) app;
        ed = main.getStateManager().getState(EntityDataState.class).getEntityData();
    }

    @Override
    protected void cleanup(Application app) {
    }

    @Override
    protected void onEnable() {
        decayContainer = new DecayContainer();
        decayContainer.start();
    }

    @Override
    protected void onDisable() {
        decayContainer.stop();
        decayContainer = null;
    }

    @Override
    public void update(float tpf) {
            decayContainer.update();
        }

    private class DecayData {
    }

    private class DecayContainer extends EntityContainer<DecayData> {

        DecayContainer() {
            super(ed, Decay.class);
        }

        Stream<DecayData> stream() {
            return Arrays.stream(getArray());
        }

        @Override
        protected DecayData addObject(Entity entity) {
            DecayData data = new DecayData();
            return data;
        }

        @Override
        protected void updateObject(DecayData data, Entity entity) {
        }

        @Override
        protected void removeObject(DecayData data, Entity entity) {
        }
    }
}

It does nothing yet. We will now fill in the needed code. Which is not really a lot. Very simple.

Decay Entity Container

Let’s begin with the Zay-ES entity container to get all the added, removed, and updated entities with a decay component attached. In the addObject() method we create our local decay data to handle the timeout. I almost always have a local data representation with some additional logic. We store the entity id and the timeout in milliseconds. That’s it.
You can add as well logic for the updateObject() method to be able to update the decay of an entity during your gameplay, think of a plant that got some water or fertilizer or tool which got repaired.

    private class DecayContainer extends EntityContainer<DecayData> {

        DecayContainer() {
            super(ed, Decay.class);
        }

        Stream<DecayData> stream() {
            return Arrays.stream(getArray());
        }

        @Override
        protected DecayData addObject(Entity entity) {
            long timeoutMs = entity.get(Decay.class).getTimeoutMs;
            DecayData data = new DecayData(entity.getId(), timeoutMs);
            return data;
        }

        @Override
        protected void updateObject(DecayData data, Entity entity) {
                }

        @Override
        protected void removeObject(DecayData data, Entity entity) {
        }
    }

Local Decay Data

The local decay data class handles the timeout. We store the start time and the timeout and with getPercent() method we return the decay as a value 0 (no decay) and 1 (fully decayed). Very simple logic.

    private class DecayData {

        EntityId id;
        private long start;
        public long timeout;

        DecayData(EntityId eId, long timoutMs) {
            this.id = entity.getId();
            this.start = System.nanoTime();
            this.timeout = timeoutMs * 1000000;
        }

        double getPercent() {
            long time = System.nanoTime();
            return (double) (time - start) / timeout;
        }
    }

Update

And finally, in the update method, we loop over all decay data and remove those which are fully decayed.

    @Override
    public void update(float tpf) {
        decayContainer.update();
        decayContainer.stream().forEach(e -> {
            if (e.getPercent() >= 1.0) {
                    ed.removeEntity(e.id);
            }
        });
    }

Additionally

You can implement as well visualization systems to make the decay of a thing like a plant or a tool visible and give feedback to the player.

The End

That’s it. Thanks for reading. If you have suggestions or questions just write a comment below.

Player control

I recently worked on my jumping abilities. In the beginning, I only could do double jumps. Whenever the player hits the ground he gots one extra jump which can be pretty handy and looks fun. But to jump from walls was very shaky and sometimes you had the extra jump and sometimes you didn’t because you jumped too late and used up that extra jump instead of a wall jump.

Again behavior tree

As with the weapons, it started pretty simple and straight forward by just program the player control. But for the double jump, I already had a counter in place which had to be updated and consumed. Motivated by the early success modeling weapons with a behavior tree implementation I start over the character control implementation with a behavior tree.
First I had to split my stuff into tasks to be able to model the walking and jumping behavior of the player with the libgdx-ai behavior tree

The main goals were walking, jumping, double jumps, and wall jumps. The wall jump was especially tricky.

Move

The moving part is simple, we just apply force on the character, limit the speed to max speed and turn the character in the proper direction. The character model implementation has an update loop where it detects/measures the speed to do the walk animation properly. We apply also force to the player midair to give the player more control.

One improvement would be to let the character look in the direction he is shooting in that case he would just move forth and back but would not change the shoot direction. This is especially for fully automatic weapons.

Double jump

The double jump was just something I saw in so many games and wanted it for mine as well.

As long you jump in the same direction as you walk, I only stop midair the vertical movement to give more control else it feels very wobbly. But the horizontal movement is untouched.

In case the player also changes the direction hitting the jump button mid-air I stop completely horizontal and vertical this makes the jumps more controllable and fun. You can do all the impossible jumps you ever dreamt of.

Wall jump

If the player pushes the jump button sticking to the wall or is close enough and has no ground underneath it he gets pushed away from the wall. Actually, the push from the wall is away and slightly upward, the character also changes its direction. If you hold the movement towards the wall the jumps out and moves back to the wall and the player doesn’t change its direction. The wall jumps are unlimited. This keeps the gameplay pretty fast. The stickiness to the wall is not very strong and you have to move fast.

As soon the player jumps on a wall the vertical movement goes to a full stop. This makes the wall jumps nice and responsive. I tried it without and it feels very fluffy.

The push from the wall should make it possible to jump up a corridor with just pressing the jump button all the time without any midair movements.

Shooting

The shooting part is pretty simple, it just triggers the gun. Maybe set a marker that the trigger is pulled so the player doesn’t change direction while shooting, see moving chapter above.

Dashing

I’m not yet sure if I and how I want to model dashing. It’s already pretty fast. And it should do something. Maybe dodge bullets or distract enemies. This is working in progress.

Keep on testing

I do a lot of testing these days. And with the behavior tree approach, I can easily change the behavior of the controls. The downside of changing the control behavior also often means that I have to rework the levels, just think of a slightly higher jump or slightly less high jump, a tiny bit less speed, new abilities like dashing. So what’s easy still has a rat tail of other implications.

But it is fun as hell.

Conclusion

The jump topic is very tricky and needs by fare more testing until I can say this is it.


Behavior Trees for Weapons

If it comes down to behavior trees many developers think of AI, robotics, or NPCs. I started to use behavior trees to make my stupid soldier NPCs patrol and shoot. They are still very stupid and sometimes shoot each other. I realized that I can use behavior trees for more than just my NPCs.

For example for my weapons. It’s actually so much fun to design and model weapons, not only from the visual representation but also in how it behaves and how it feels to use it.

Note that…

this blog article doesn’t want to explain behavior trees in all lengths and depths. There are many blogs and articles available which do a great job explaining behavior trees. Furthermore, you will probably also need to read the documentation for your behavior tree implementation at hand.

Here a small selection of links:

It starts always simple

When I first introduced my weapons to my platformer "All Fucked Up", I did it the classical way by simply programing them. It started simple with a weapon which eject a shell, launch a bullet, place a flash light and make a boom sound. Even when I modeled a submachine gun it was simple. I thougt well how messy can that possible go. And then a double barrel shot gun came along the way and everything started to get messy.

After two shots the shotgun should eject two shells, not imediately but with a small delay. As well I wanted to limit the rounds per minute. I managed to do this and ended up with the following code:

   public void shoot(double tpf, Vec3d location, Quatd orientation) {
        time += tpf;
        if (pull) {
            if (cartridge > 0 && time > 0.25) {
                cartridge -= 1;
                time = 0;
                launchProjectile(orientation, location);
                if (cartridge <= 0) {
                    eject = true;
                    ejectTime = 0;
                }
            }
            if (time > 2.5) {
                cartridge = 2;
            }
        }
        if (eject && ejectTime < 0.6) {
            ejectTime += tpf;
        } else if (eject) {
            eject = false;
            ejectShell(orientation, location);
        }
    }

It doesn’t look too bad to be honest, if you carefully read it you will get your head around it. But you probably also see the problem with this approach. Just think of extending it with a limited amount of ammo you collected. A force-reload, where you want to reload the weapon even if you didn’t shoot all ammo. It was no fun to try to extend it.

There must be an alternative to this messy code, which is hard to maintain, extend, or adapt. I tried to refactor it in breaking it down to smaller and simpler pieces. The main problem remained, it was still hard to extend or adapt.*

The weapons do have behavior and why not use a behavior tree implementation as a way out. It was one of the best decision I made for this game.

A very short story about behavior trees

I use the behavior tree implementation from libgdx-ai.
We have tasks, sequences, selectors, and parallels. In this article, I don’t need parallels.

I just describe very short what the single parts do.

Task

A task can either fail, succeed or stay running. A task in the state running, will be reentered on the next execution of the behavior tree.

Sequence

A sequence is a special task that runs each of its child tasks in turn. It will fail immediately when one of its children fails. As long as its children succeed, it will keep going. If it runs out of children, it will succeed.

Selector

A selector is a special task that runs each of its child tasks in turn. It will succeed when one of its children succeed. As long as its children are failing, it will keep on trying the next child. If it runs out of children completely, it will fail.

Ok then let us use this behavior tree

On the top level of the behavior tree we have a sequence with two tasks, the first one will reload the gun if needed and if possible, the second task will shoot if the trigger is pulled and there is at least one round chambered.

Let’s look at how we model the "need reload" task. Probably not the best naming. The reload task consist of a selector with two child tasks. The first task checks if the ammo count of the gun is bigger than zero. The second task does a delayed reload of the gun and fails if the player does not have any shotgun rounds left else it succeeds. The check if it really can reload is done in the reload task.

Shooting is basically a sequence of tasks. First, we check if the trigger is pulled and fail if not. If the trigger is pulled we launch the projectiles, this task does always succeed. After that, we wait until the trigger gets released to have a controlled shooting. After we release the trigger we check if there is still life ammo chambered and fail if so. In the case there is no life ammo anymore we wait a fraction of a second and eject two shells and succeed.

As you can see the shoot task also returns with fail or succeed this is important and has to be considered if you want to proceed after the shooting task with an additional task whatever this might be…

And here the complete behavior tree

Looks cool. The code of this behavior tree looks like this

        this.bb = new WeaponBlackboard(main, this);

        Sequence<WeaponBlackboard> reloading = new Sequence<>();
        reloading.addChild(new Wait(1.4f));
        reloading.addChild(new Reload());

        Selector<WeaponBlackboard> needReload = new Selector<>();
        needReload.addChild(new AmmoCount());
        needReload.addChild(reloading);

        Sequence<WeaponBlackboard> shoot = new Sequence<>();
        shoot.addChild(new DetectPullTrigger());
        shoot.addChild(new LaunchProjectile());
        shoot.addChild(new WaitUntilSuccess<>(new Invert(new DetectPullTrigger())));
        shoot.addChild(new Invert<>(new AmmoCount()));
        shoot.addChild(new Wait<>(0.6f));
        shoot.addChild(new EjectShell());

        Sequence<WeaponBlackboard> gun = new Sequence<>();
        gun.addChild(needReload);
        gun.addChild(shoot);

        this.bh = new BehaviorTree<>(gun, bb);

And in the update loop you call something like

bh.next()

It is so much easier to change the behavior or to adapt it. And a new weapon is done literally in no time. Even if I don’t use a graphical editor. It’s so much fun to model weapons with this approach.

Tasks and reusable code

Because we have capsulated the stuff into tasks, we can reuse these tasks for new weapons. Like DetectPullTrigger(), LaunchProjectile(), AmmoCount() and EjectShell(). And also very generic tasks and decorators like Wait(seconds), WaitUnitlSucceed(task), AlwaysSucceed(task) and Invert(task).

For our own tasks, we can handover a weapon blackboard where we keep together everything we need. The weapon itself implements an interface with the basic actions, like launch bullets, eject shells and reloading as this is very weapon specific.

So let’s conclude

The main message of this blog article is not the solution for the double-barrel shotgun. The main message is that you can use behavior trees beyond NPC AI. Whatever has a behavior can be modeled with a behavior tree even if it is not too obvious in the beginning. If you have a graphical behavior tree editor your game designers can model that part of the game directly and have instant feedback if their ideas work out or not.

I also model my controller and the level switching logic with a behavior tree approach. These parts are much easier to adapt and to extend now. It’s also very handy as you simply can try out all your weird ideas without a lot of coding. What makes it really really fun.

The end

That’s it, I hope you enjoyed it.