Cinematic Camera

I Want

In the process of my game, I started to think about an advanced camera system. I wanted to define camera bounding boxes in which a certain type of camera is active. But this was not enough for me as I wanted them stacked. And I wanted to attach these camera bounding boxes as well on moving targets like enemies.

Why?

Well, I was thinking of a cool intro where the hero falls down a deep hole. I wanted to zoom close in the beginning and zoom out in the middle part and zoom in on the landing. Furthermore, I wanted to overlay camera bounding boxes to zoom in on certain objects or when I enter or leave a room or level. I was as well thinking of a centered camera for a squared room to see everything in it and as soon I leave this room I wanted my follow camera back. So it’s complicated. And then I thought OK would be cool to have a zoom-in if enemies approach me to give that more focus and this camera bounding box has to follow the enemy… of course.

So it’s all about the cinematic effects I guess.

How?

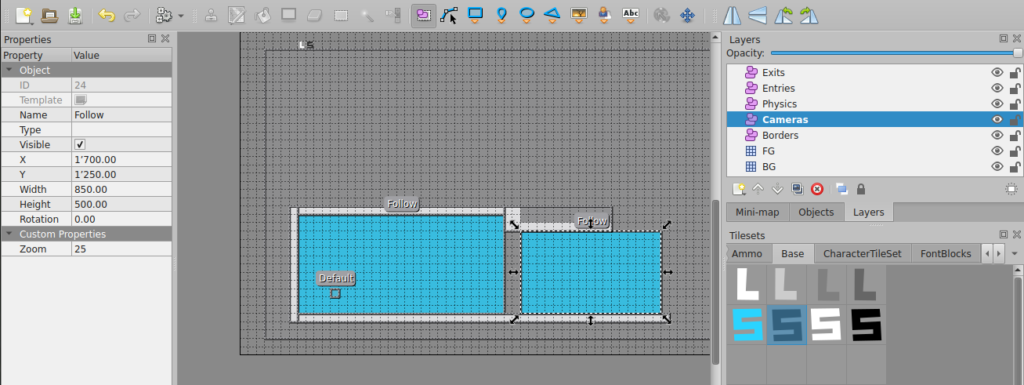
I think the best is a visualization of my idea.

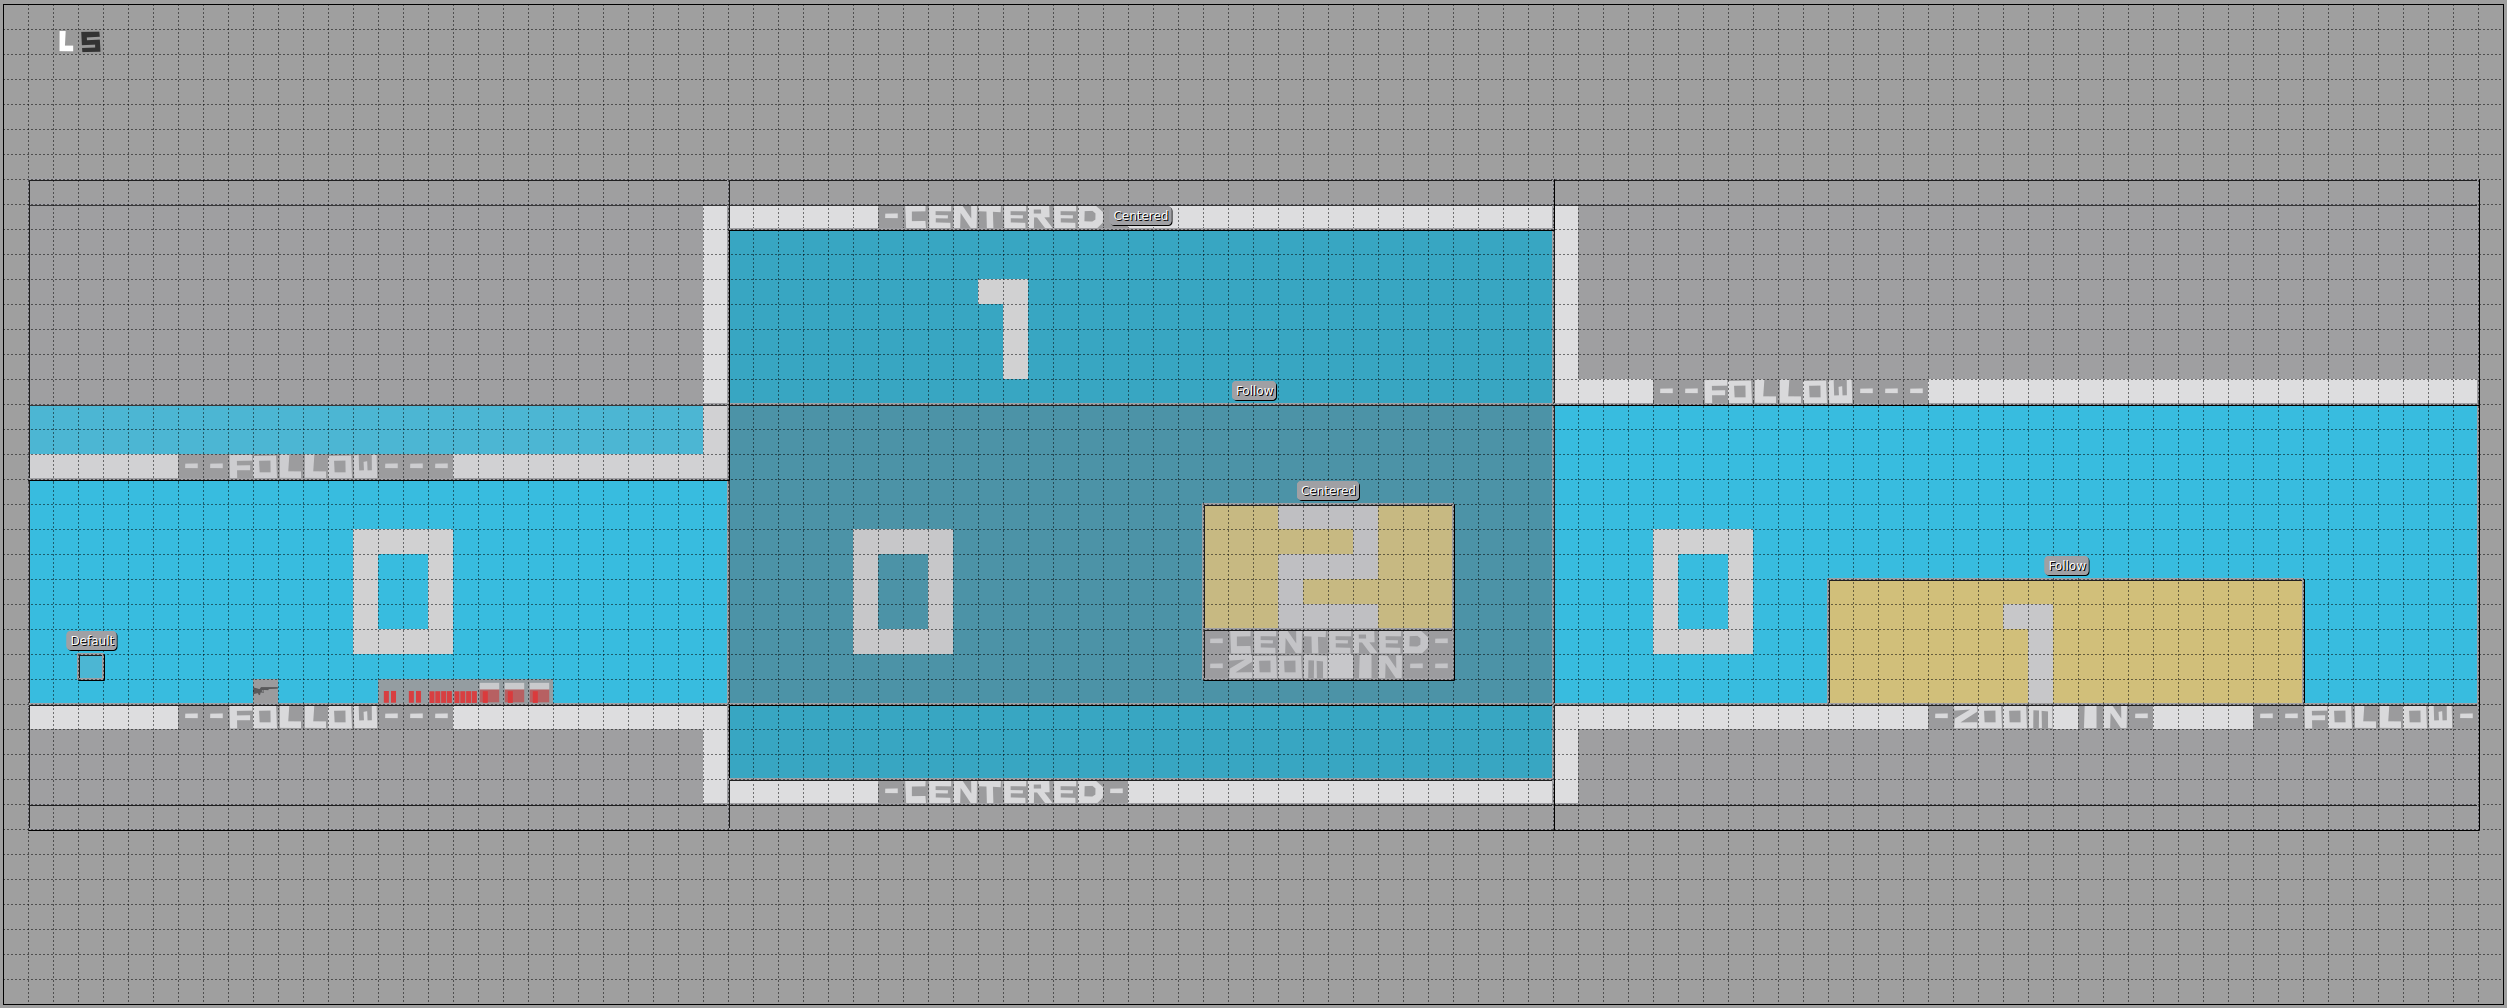
I tried to describe it in the level itself. The long light blue bounding box across the full room contains a follow camera and is on the bottom of the stack that’s why it’s numbered with a ‘0’. The middle camera bounding box is darker blue and is on top of the following camera and contains a centered camera, which means inside this box the camera will not follow the character but point to the center of the bound box. This box has the priority ‘1’ and is on top of the priority ‘0’. On top of this, we have a yellow bounding box with a zoomed-in centered camera with the priority ‘2’. The higher the number of the bounding box camera the higher its priority. On the right, we see a yellow bounding box with priority ‘1’ which is higher than ‘0’ with a follow camera with a different zoom.

In Action

Now in action

This is pretty neat isn’t it?

Behind the Scenes

OK, I try to explain it with some pseudo-code. Let’s assume we have all the camera bounding boxes and their camera type. Furthermore, we can load these camera types on the fly.

public void updateCamera(float tpf, Vector2 playerPosition) {
    stream()
            .filter(cam -> cam.getAabb().contains(playerPosition))
            .sorted(Comparator.comparingInt(CameraAabbData::getOrder).reversed())
            .findFirst()
            .filter(cam -> cam.getMyCamera() != currentCam)
            .ifPresent(cam -> {
                LOG.debug("Enter camera area with cam data type: " + cam.getType() + " properties: " + cam.getProperties());
                if (cam.getMyCamera() == null) {
                    cam.setMyCamera((MyCamera) feather.instance(cam.getType()));
                }
                currentCam = cam.getMyCamera();
                currentCam.setAabb(cam.getAabb());
                currentCam.setProperties(cam.getProperties());
            });
    currentCam.update(tpf);
}

So in short

  • We check if the player is in the camera AABB
  • We sort the camera AABB due to its order
  • We just take the first, which means the top one (it’s ordered)
  • The next check is to avoid that we set the camera properties on every frame
    • And if there is a camera AABB we check if we already instantiated the camera (caching)
    • We set the current camera and its properties
  • Last but not least we update the current camera on every frame
    • A lerp function smooths the switch from one zoom to another
    • A follow camera for example updates its position depending on the character’s movement
    • Update other dynamic features of the current camera

The object “cam” is just a data holder and often referred as a DTO.

Barrel Distortion Lens

After the fisheye lens shader turned out to be too extreme for All Fucked Up I looked for other lens shaders and found barrel distortion shaders which makes a similar effect like a fisheye but less extreme. It just widens up the lens. Looks totally cool. I got the best and simplest shader for barrel distortion here on github. It’s in a different format than I need it for jMonkeyEngine but was quite simple to adapt it.

I always start with the part I need to embed the shader in the code and as I do not make anything fancy or parametrized it’s fairly straight forward

package ch.artificials.bubble.system.mvc.view.post.filter;
import com.jme3.asset.AssetManager;
import com.jme3.material.Material;
import com.jme3.post.Filter;
import com.jme3.renderer.RenderManager;
import com.jme3.renderer.ViewPort;
public class BarrelDistortionFilter extends Filter {
     public BarrelDistortionFilter() {
         super(BarrelDistortionFilter.class.getSimpleName());
     }

     @Override
     protected Material getMaterial() {
         return material;
     }

     @Override
     protected void initFilter(AssetManager manager, RenderManager renderManager, ViewPort vp, int w, int h) {
         material = new Material(manager, "MatDefs/Post/BarrelDistortion.j3md");
     }
}

The referenced MatDefs/Post/BarrelDistortion.j3md holds the references to the shader code and also defines possible parameters which we want to hand over from code to the shader code.

MaterialDef Toon {
    MaterialParameters {
         Int NumSamples
         Int NumSamplesDepth
         Texture2D Texture
         Color Color        
    }
    Technique {
         VertexShader GLSL100:   MatDefs/Post/BarrelDistortion.vert
         FragmentShader GLSL100: MatDefs/Post/BarrelDistortion.frag
         WorldParameters {
         }
         Defines {
             RESOLVE_MS : NumSamples
         }
    }
}

The vertex shader code is very simple and just hands over the tex coordinate and the position

import "Common/ShaderLib/GLSLCompat.glsllib"
attribute vec4 inPosition;
varying vec2 Vertex_UV;
attribute vec2 inTexCoord;
void main()
{
    vec2 pos = inPosition.xy * 2.0 - 1.0;
    gl_Position = vec4(pos, 0.0, 1.0);    
    Vertex_UV = inTexCoord;
}

The barrel distortion logic is in the fragment shader code and looks like this

import "Common/ShaderLib/GLSLCompat.glsllib"
import "Common/ShaderLib/MultiSample.glsllib"
uniform sampler2D tex0;
varying vec2 Vertex_UV;
uniform sampler2D Texture;
const float BARREL_DISTORTION = 0.25;
const float rescale = 1.0 - (0.25 * BARREL_DISTORTION);
void main()
{
    vec2 tex0 = Vertex_UV;
    vec2 texcoord = tex0 - vec2(0.5);
    float rsq = texcoord.x * texcoord.x + texcoord.y * texcoord.y;
    texcoord = texcoord + (texcoord * (BARREL_DISTORTION * rsq));
    texcoord *= rescale;
    if (abs(texcoord.x) > 0.5 || abs(texcoord.y) > 0.5)
         gl_FragColor = vec4(0.0);
    else
    {
         texcoord += vec2(0.5);
         vec3 colour = texture2D(Texture, texcoord).rgb;
         gl_FragColor = vec4(colour,1.0);
    }
}

And the lens effect in action looks like this


I get a small commissions for purchases made through the following links, I only have books in this section which I bought myself and which I love. No bullshit.

Fisheye Lens Shader

I always wanted to write some shaders and I always procrastinated it. But now I did it. Finally. I got a good source for a fisheye shader and I adapted it for the jMonkeyEngine which was not too hard.

Fisheye.j3md is the thing which holds everything together. This is jMonkeEngine specific and may look different for your game engine you use. This just holds the two shaders files together and it’s the place where you can specify the parameters which you need if you want to handover values from the code the shader pipeline.

MaterialDef Toon {
 MaterialParameters {
     Int NumSamples
     Int NumSamplesDepth
     Texture2D Texture
     Color Color
   }
   Technique {
     VertexShader GLSL100:   MatDefs/Post/Fisheye.vert
     FragmentShader GLSL100: MatDefs/Post/Fisheye.frag
     WorldParameters {     }
     Defines {
       RESOLVE_MS : NumSamples
     } 
   }
 }

Fisheye.vert is the vertex file and here I had to adjust the fact that jMonkeyEngine hands in the position as inPosition and as well the texture coordinate as inTexCoord. The example I got was for another game engine where the input UV was a vec4. To avoid having to change too much I packed the vec2 inTextCoord (which is basically the same thing as the vec4 UV) into a vec4 even tho in the end the fragment file will only use xy means the vec2.

#import "Common/ShaderLib/GLSLCompat.glsllib"
attribute vec4 inPosition;
varying vec4 Vertex_UV;
attribute vec2 inTexCoord;
void main() {
     vec2 pos = inPosition.xy * 2.0 - 1.0;
     gl_Position = vec4(pos, 0.0, 1.0);    
     Vertex_UV = vec4(inTexCoord, 0.0, 0.0);
}

That’s it the rest I took over untouched from here.

Fisheye.frag

import "Common/ShaderLib/GLSLCompat.glsllib"
import "Common/ShaderLib/MultiSample.glsllib"

uniform sampler2D tex0;
varying vec4 Vertex_UV;
const float PI = 3.1415926535;

void main() {
  float aperture = 178.0;
  float apertureHalf = 0.5 * aperture * (PI / 180.0);
  float maxFactor = sin(apertureHalf);
  vec2 uv;
  vec2 xy = 2.0 * Vertex_UV.xy - 1.0;
  float d = length(xy);
  if (d < (2.0-maxFactor)) {
    d = length(xy * maxFactor);
    float z = sqrt(1.0 - d * d);
    float r = atan(d, z) / PI;
    float phi = atan(xy.y, xy.x);
    uv.x = r * cos(phi) + 0.5; uv.y = r * sin(    phi) + 0.5
  }  else  { 
    uv = Vertex_UV.xy;
  }
  vec4 c = texture2D(tex0, uv);
  gl_FragColor = c;
}

There is a little bit of Java code involved to be able to add the filter as post filter. This is most likely different for your game engine.

package ch.artificials.bubble.system.mvc.view.post.filter;

import com.jme3.asset.AssetManager;
import com.jme3.material.Material;
import com.jme3.post.Filter;
import com.jme3.renderer.RenderManager;
import com.jme3.renderer.ViewPort;

public class FisheyeFilter extends Filter {
    public FisheyeFilter() {
        super(FisheyeFilter.class.getSimpleName());
    }

    @Override
    protected Material getMaterial() {
        return material;
    }

    @Override
    protected void initFilter(AssetManager manager, RenderManager renderManager, ViewPort vp, int w, int h) {
        material = new Material(manager, "MatDefs/Post/Fisheye.j3md");
    }
}

And this is the effect. Not too nice but a good starting point to play with this shader.


I get a small commissions for purchases made through the following links, I only have books in this section which I bought myself and which I love. No bullshit.

Camera System

Finally, we started to think about the camera logic. How to move the camera relatively with the character we control in a way that the player gets the most out of it. There was not so much to find but this Gamasutra article from Itay Keren helped me a bunch. I know at least have a clue what I’m talking about. And a tweet about the camera system of qomp from Stuffed Wombat inspired me to do something similar.

Head Into

The problem I had was that the camera was always following the character which made it quite a challenge to watch and might cause motion sickness.

Camera Systems

Lerp Camera

I found on this page a good lerp implementation which I use as well. It solved almost all my jitter problems I had with my own lerp camera implementation. It’s pretty cool and worth a read.

Projected-Focus

This is a projected-focus camera that looks a bit ahead of the player while moving.

The initial camera code was very straight forward and simple

Vector2 velocity = new Vector2(player.dyn4jBody.getLinearVelocity());
camera.setLocation(new Vector3f((float) (player.location.x + velocity.x / 2),
            (float) (player.location.y + velocity.y / 2), 0));

I just used the velocity to catch up with the player and look in the direction he currently moves. This was needed because the underlying lerp-smoothing logic, will let the camera fall back on high speed like a free fall so a velocity-based look ahead seemed the best solution.

This camera always follows the player. This can be annoying if we do wall jumps where the character always moves in and out. I guess after a while people will get sick.

Camera-Window But Keep Projected-Focus

The goal was to reduce the camera movement to a minimum and focus on the direction we move. For this, I implemented a combined camera which was camera-window and projected-focus. This means inside a window the character can move while the camera does not move. As soon the player touches the edge of the virtual window the camera starts to follow and look ahead.

You can imagine that this code would be much more complicated. As well I only wanted the window for the horizontal move but not for the vertical moves (for the vertical moves I do not yet have a clear plan). After a few trials and some refactoring later it was clear that I will use a behavior tree to implement the much more advanced logic for this camera-window and project focus logic.

Sequence<CameraBlackBoard> checkStillMovingX = new Sequence<>();
checkStillMovingX.addChild(new Invert<>(new DetectPlayerMoving(Axis.X, 0.1f)));
checkStillMovingX.addChild(new SetCamFollowing(Axis.X, false));

Selector<CameraBlackBoard> shouldFollowX = new Selector<>();
shouldFollowX.addChild(new Invert<>(new DetectPlayerCamRange(Axis.X, 4)));
shouldFollowX.addChild(new DetectCamFollowing(Axis.X));

Sequence<CameraBlackBoard> followX = new Sequence<>();
followX.addChild(shouldFollowX);
followX.addChild(new SetCamFollowing(Axis.X, true));
followX.addChild(new CamFollow(Axis.X, 0.75f));

Parallel<CameraBlackBoard> control = new Parallel<>(Parallel.Policy.Sequence);
control.addChild(new AlwaysSucceed<>(followX));
control.addChild(new AlwaysSucceed<>(new CamFollow(Axis.Y, 0.5f)));
control.addChild(new AlwaysSucceed<>(checkStillMovingX));

bh = new BehaviorTree<>(control, bb);

I had to distinguish between horizontal and vertical movements as this is decoupled. I applied the window logic only for the horizontal movement (the x-axis) which was even with a behavior tree implementation a bit tricky to achieve. The vertical movement is in parallel to the horizontal movement but strictly following. The last sequence checks if the character stopped so we can stop following. We following a character if he touches the window border and keeps following until the character stops. The behavior tree forces us to break the code up into simple tasks which makes it a piece of cake to implement and test.

This reduces the movement of the camera while the character walks back and forth within a specified window. I still have to figure out and fine-tune what is the best window size. It also looks ahead in the direction we move.

There is an underlying camera that does lerp-smoothing to make it softer on direction changes and stops. The underlying camera also does have a kickback function for the camera kickbacks if we fire a weapon to give the weapon more boom. I use the kickback vertically as well for hard landings which gives it a bigger impact.

Zoom

I added a simple “Zoom” property and extended my cameras with a setProperties to set any kind of property and every camera implementation can get whatever property it understands and apply it. The zoom is simply the distance to the character as I decided to use a perspective camera instead of an orthogonal camera. The game also looks a bit more interesting with a perspective camera.

Camera Switch

I implemented as well a simple camera switch logic. With tilded I have an object group where I define the camera area, the name of the camera type, and the camera properties like “Zoom”.

        cameraContainer.stream()
                .filter(cam -> !cam.entered)
                .filter(cam -> isPlayerInCam(cam))
                .findFirst()
                .ifPresent(cam -> {
                    cam.entered = true;
                    myCamera = (MyCamera) feather.instance(cam.type);
                    myCamera.setProperties(cam.properties);
                });
        
        cameraContainer.stream()
                .filter(cam -> cam.entered)
                .filter(cam -> !isPlayerInCam(cam))
                .findFirst()
                .ifPresent(cam -> {
                    cam.entered = false;
                });

That’s it so far. I enjoyed the journey 🙂


I get a small commissions for purchases made through the following links, I only have books in this section which I bought myself and which I love. No bullshit.