Level Design Patterns

Intro

A collection of level design patterns, which might be helpful for someone.

Patterns

Safe Zone

A safe zone is a pattern that refers to an area where the players are not exposed to danger. A Safe Zone gives the player the possibility to analyze the surroundings and plan their next actions. A safe zone is especially important at the starting point of the avatar.

When you enter a level you always should be in a safe zone where nothing attacks or threatens you. No enemy should be able to enter the safe zone, it’s upon the player to leave the safe zone.

When you enter a level you always should be in a safe zone where nothing attacks or threatens you.

My rooms for All Fucked Up start always in a safe zone means no hazard or enemies will enter that zone. I will use leap of faith jumps for storytelling and therefore I will soften the strict rules for the safe zone a little bit. It will be guaranteed that there is no hazard or enemy at the landing point which would kill you instantly. The player should have enough time to react and have the necessary amount of ammunition and weaponry. As well a leap of faith jump will never be at the end of a room or level. Combined with the fast and endless respawn this should be acceptable.

Guidance

Guidance is a pattern that refers to the use of non-verbal game elements to guide players in an intended direction. Guidance is especially important for explorative games.

Guide the character through the level shape from the start to the end. Besides gangways, shafts, and entry/exit doors, also enemies or collectibles can be used to guide the player through the level. But as well cracks in a wall can indicate that with a certain amount of force you can destroy that wall to enter a new room.

My levels have entry and exit points in rooms that are not too big. I plan to have hidden entries to bonus rooms and those I have to somehow decorate with a guidance pattern like destroyable blocks and walls.

Branching

Branching is a pattern that refers to providing the players with multiple paths to reach their goals.

Not just one possible path but a couple of possible paths. You can have difficult but faster ways through for experienced players or simpler but slower paths for beginners.

Alternative ways to kill your enemies.

For All Fucked Up I recently found another way of branching, not in the sense of alternative paths but alternative ways to kill your enemies. I started to work on a level with falling blocks and the blocks start to shake for a sec and fall down as soon I’m underneath them. If I can lure my enemies underneath the falling blocks and manage to save my ass in time I can kill the enemies without a gun. I can now think of more ways like this, like shooting fuel barrels near enemies and letting them be blown away.

Foreshadowing

Safely introduce a new enemy for example, by showing the new enemy in a safe way before it attacks you.

There are different ways to introduce new enemies, threats, or hazards. One way is to combine Foreshadowing with the Safe Zone pattern, the player is placed in a safe spot where he can observe the new enemy, threat or hazard and plan his action. Even new possibilities could be introduced that way, like the trampoline or the moving platform in celeste.

One way is to combine Foreshadowing with the Safe Zone pattern.

In All Fucked Up fast respawn after death, endless lives, and short levels make it quite easy to get knowledge of new enemies and threads. All my threads and enemies are introduced isolated at the beginning of a room, this gives the player an easy way to figure it out as he gets respawned right away after he gets killed by the new threat or enemy.

Layering

Layering is a pattern that refers to combining multiple game objects to create a new experience or challenge.

This pattern is most often combined with Foreshadowing. For example, introducing a new enemy separated and then combining them in a flock or together with already introduced enemies, threats or hazards. This gives the game new challenges.

In All Fucked Up I combine a lot the Foreshadowing and the Layering pattern. One example are the falling blocks. Whenever the player is underneath a falling block the block starts to shake for a sec and fall then down and smashes everything underneath also enemy entities. The player can combine the falling block in his tactic to smash following enemies.

The player can combine the falling block in his tactic to smash following enemies.

Pace Breaking

Pace breaking pattern refers to purposely changing the dramatic arc of the game.

Changing the surroundings or the sound for example when a boss enters the scene. Or to slow down the game for short moment to give the player time to prepare for the next wave of enemies.

In All Fucked Up I have some silent moments when finishing a room by adding a longer corridor where you just walk. But as well by environmental sound change. For example in the hall of hydraulic hammers you hear the hydraulic sound when the hammers lift and the boom noise when the hit the ground.

Proxy

Proxy is a pattern that refers to indirectly triggering an action.

Switches that open a door or unleash an event. The switch is not directly connected. Or an invulnerable enemy which I can only be kill by destroying a power supply. Fuel barrels which explode if you shoot at it. And more.

In All Fucked Up I introduced smart cards which you need to open the door to the next room. Those smart cards are carried by some of the enemies. This also should give the player the necessity to shoot those fuckers and not just try to avoid them.

Privileged Move

Privileged Move is a pattern that refers to the fact that not all objects do have the same impact on different objects.

Bullets from enemies do not damage enemies themselves only the player. Or an acid ground does not affect enemies but the decrease the players health.

For All Fucked up bullets from enemies only damage the player never other enemy entities. In case I introduce co-op mode I will do the same for the players that player bullets only damage enemies never the other player.


I get a small commissions for purchases made through the following links, I only have books in this section which I bought myself and which I love. No bullshit.

References

https://www.gamasutra.com/blogs/AhmedKhalifa/20190610/344344/Level_Design_Patterns_in_2D_Games.php

https://eledris.com/design-2d-platformer-levels/

https://www.gamasutra.com/view/feature/132649/the_case_for_game_design_patterns.php?print=1
https://www.youtube.com/watch?v=4RlpMhBKNr0

ECS Pattern: Damage System

Writing games is often about dealing with health and damage. With entity component system this is fun to do. Furthermore you can give any entity health or damage any time, it is literally only adding the health or damage or both component to that entity.

Bullets And Characters

To handle health and damage we need health, damage, position, and shape components for the involved entities. A bullet usually does have a damage component besides a position and its shape. A character usually does have a health component besides a position and its shape. The damage system handles these entities and calculates the new damage and health of the involved entities. I usually remove the damage entity a soon it hits something, but if you think of a spell or an ax this is not necessarily true. For a bullet, you might add a very short decay component to let the bullet have a physical impact on the body it hits (read here about the decay pattern) before it vanishes.

A Monkey And Doctor Zaius

For this example I use jMonkeyEngine and Zay-ES. Zay-ES features EntityContainer with an update method which takes care of all created, updated and deleted entity and it provides an array of all entities which are currently in the set (not removed). This makes the code super easy. If your ECS system doesn’t have then you probably have to do a bit more leg work.

Components

I shortly introduce the components we will need. The components are pure data without methods that operate on this data which is very different from the OO programming paradigm.

Health

We just store the amount of health in this component. Furthermore, we define -1 as immortal (for concrete walls for example).

public class Health implements EntityComponent {
    static public int IMMORTAL = -1;
    private Integer health;
    public Health(Integer health) {
        this.health = health;
    }
    public Integer getHealth() {
        return health;
    }
}

Damage

We store the amount of damage in this component, that’s it.

public class Damage implements EntityComponent {
    private final int damage;
    public Damage(int damage) {
        this.damage = damage;
    }
    public int getDamage() {
        return damage;
    }
}

Position

And the position component holds the current 3D location (read my first ECS post how to move objects around).

public class Position implements EntityComponent {
    private final Vec3d location;
    public Position(Vec3d loc) {
        this.location = loc;
    }
    public Vec3d getLocation() {
        return location;
    }
}

Shape

And then finally the shape. To make our life simple we just have sphere objects with a radius.

public class SphereShape implements EntityComponent {
    private double radius;
    public SphereShape(double radius) {
        this.radius = radius;
    }
    public double getRadius() {
        return radius;
    }
}

Damage Entity Set

In the damage system we keep two sets of entities. The first set called the DamageContainer handles all entities with a position, shape and damage component.

    private class DamageData {

        EntityId entityId;
        AABB aabb;
        Vec3d location;
        int amount;
    }

    private class DamageContainer extends EntityContainer<DamageData> {

        DamageContainer(EntityData ed) {
            super(ed, Damage.class, Position.class, SphereShape.class);
        }

        Stream<DamageData> stream() {
            return Arrays.stream(getArray());
        }

        @Override
        protected DamageData addObject(Entity entity) {
            DamageData result = new DamageData();
            result.entityId = entity.getId();
            result.amount = entity.get(Damage.class).getDamage();
            updateObject(result, entity);
            return result;
        }

        @Override
        protected void updateObject(DamageData data, Entity entity) {
            SphereShape sphereShape = entity.get(SphereShape.class);
            data.location = entity.get(Position.class).getLocation();
            Vector2 center = new Vector2(data.location.x, data.location.y);
            data.aabb = new AABB(center, sphereShape.getRadius());
        }

        @Override
        protected void removeObject(DamageData t, Entity entity) {
        }
    }

The data we want is the entity id (to be able to get rid of), the location, amount of damage, and an AABB object for simple collision calculation.

Health Entity Set

On the other hand, we have the health set we call it HealthContainer and it goes like this

    private class HealthData {

        EntityId entityId;
        AABB aabb;
        int amount;
    }

    private class HealthContainer extends EntityContainer<HealthData> {

        HealthContainer(EntityData ed) {
            super(ed, Health.class, Position.class, RectangleShape.class);
        }

        Stream<HealthData> stream() {
            return Arrays.stream(getArray());
        }

        @Override
        protected HealthData addObject(Entity entity) {
            HealthData result = new HealthData();
            result.entityId = entity.getId();
            result.amount = entity.get(Health.class).getHealth();
            updateObject(result, entity);
            return result;
        }

        @Override
        protected void updateObject(HealthData data, Entity entity) {
            SphereShape sphereShape = entity.get(SphereShape.class);
            data.location = entity.get(Position.class).getLocation();
            Vector2 center = new Vector2(data.location.x, data.location.y);
            data.aabb = new AABB(center, sphereShape.getRadius());
        }

        @Override
        protected void removeObject(HealthData t, Entity entity) {
        }
    }

The data we want is the same as for the DamageContainer, the entity id (to be able to get rid of it as well), the location, amount of health and an AABB object for simple collision calculation.

The Update Loop

In the update loop we now update the HealthContainer and the DamageContainer and then we loop over all health entities and inside that we loop over all damage entities and calculate the new Health and Damage component. In our case, we remove the Damage component from the entities on collision and only calculate the new Health component.

   @Override
    public void update(float tpf) {
        healthConatiner.update();
        damageContainer.update();

        healthConatiner.stream().forEach(h -> {
            damageContainer.stream()
                    .filter(d -> !d.parentId.equals(h.entityId))
                    .filter(d -> d.aabb.overlaps(h.aabb))
                    .forEach(d -> {
                        handleHealthAndDamage(h, d);
                    });
        });
    }

Calculus

Let’s look into how we handle health and damage. First we check if the health entity is immortal like a concrete wall and skip the calculation. If the health entity is not immortal we calculate the new health and remove the health entity if the health is equal or below zero. In the end we remove the damage entity as it is used up on collision.

    private void handleHealthAndDamage(HealthData health, DamageData damage) {
        if (health.amount != Health.IMMORTAL) {
            health.amount = health.amount - damage.amount;
            if (health.amount > 0) {
                ed.setComponent(health.entityId, new Health(health.amount));
            } else {
                ed.removeEntity(health.entityId);
            }
        }
        ed.removeEntity(damage.entityId);
    }

Benefit

If your game designer has the famous idea at the last minute possible that your weapons should also be able to destroy the furniture you will not spend hours or days making this happen as you simply can add health to these furniture entities and you are done. Because the code is already in place which handles these entities on collision. This is the actual beauty of the entity component system.

I’m Reading

I’m currently reading the self-published Data Oriented Design from Richard Fabian to get me a deeper insight how to design games with entity component system or as the book title says data-oriented design. A very interesting and cool topic so much different from what I learned with OO approaches. Data-oriented design not only improves the execution time but also your developing performance. Counts especially for games with its short update cycle and the game data which is changing constantly.

The End

You can extend and tweak this example as you like. Go wild.

In case you have questions or suggestions, let me know in the comments below.

History Back and Forth

Whenever you write a level editor or maybe a turn-based game (like chess) it would be of great help having undo and redo functionality at hand.

Based on the Game Programming Patterns book from Robert Nystrom I did like to implement an undo/redo history class. The design pattern is based on the Design Patterns book of the gang of four.

Side Note

I use this programming pattern for my test-driven development workshop, I do occasionally. If you are interested in that, just let me know in the comments below.

Implementation

Introduction

A command can be anything from move one square to shoot, cast a spell, and more. The command must encapsulate everything needed to execute and to undo his action. Every command is an own instance. The commands then get stored in a history object which I will show you in this blog post.

Command Interface

The whole thing starts with a command interface which looks like this

package mygame;

public interface Command {
    public void execute();
    public void undo();
}

The only thing you need in command is execute and undo. With that, you can even make a redo. Really?

History Execute, Undo, and Redo

I’ll show you the idea of the history implementation.

package myexample;

public History {
    public void execute(Command command) {}
    public void undo() {}
    public void redo() {}
}

To make the whole thing work you need to encapsulate everything needed to execute the command in your command object, which is of great importance.

For the implementation of the history class, I used LinkedList as it was the simplest way I found for this. Of course, you can implement as well some ring buffer structure using plain arrays, but I did not have the nerve for this.

Ok, let’s start with the basics. First of all, we need to execute the command like this

public void execute(Command command) {
    command.execute();
}

That wasn’t too hard, but to be able to undo it, we need to hold that command instance in a data structure, a linked list in my case.

    private LinkedList<Command> commands;
    public History(int size) throws InstantiationException {
        commands = new LinkedList<>();
    }

    public void execute(Command command) {
        commands.add(command);
        command.execute();
    }

    public void undo() {
        commands.removeLast().undo();
    }

Oh, wait what if I undo when the list is empty? Yes, it fails, so we need some guards to protect it.

    public void undo() {
        if (!commands.isEmpty()) {
            commands.removeLast().undo();
        }
    }

Improvments

That looks not that bad and it works already. But let’s improve it a little more. For example, does this implementation not limit the number of commands in our history, so let’s introduce a size.

    private int size;

    public History(int size) throws InstantiationException {
        if (size == 0) {
            throw new InstantiationException("0 is not a valid history size");
        }
        this.size = size;
        commands = new LinkedList<>();
    }

And now we have to improve the execute method with this size information, by dropping the first command f we hit the capacity of our history.

    public void execute(Command command) {
        if (commands.size() >= size) {
            commands.removeFirst();
        }
        commands.add(command);
        command.execute();
    }

Redo

A redo would be cool and it turns out to be very simple. We need a second linked list for book-keeping.

    private LinkedList<Command> redoCommands;
    public History(int size) throws InstantiationException {
        // ...
        redoCommands = new LinkedList<>();
    }

Then we have to store all undoed commands in that redoCommands list.

    public void undo() {
        if (!commands.isEmpty()) {
            Command command = commands.removeLast();
            redoCommands.add(command);
            command.undo();
        }
    }

Now we are prepared for the redo method

    public void redo() {
        if (!redoCommands.isEmpty()) {
            execute(redoCommands.removeLast());
        }
    }

One small problem we have to solve, what if we did undo 2 times and then call execute and after that call redo? Yeah, it will end up in redo commands which actually should be cleared. So let’s clear the redo command list on execute. This is not that easy as the redo itself calls execute to have the command book-keeping for free. The easiest way is to have an internal execute which is called by execute and redo and only execute clears the redo commands list.

    public void execute(Command command) {
        redoCommands.clear();
        internalExecute(command);
    }

    public void redo() {
        if (!redoCommands.isEmpty()) {
            internalExecute(redoCommands.removeLast());
        }
    }

    private void internalExecute(Command command) {
        if (commands.size() >= size) {
            commands.removeFirst();
        }
        commands.add(command);
        command.execute();
    }

Copy & Paste Code

And to make it a simple copy&past task to take this into your project here the things you need

package myexample;

import java.util.LinkedList;

public class History {

    private LinkedList<Command> commands;
    private LinkedList<Command> redoCommands;
    private int size;

    public History(int size) throws InstantiationException {
        if (size == 0) {
            throw new InstantiationException("0 is not a valid history size");
        }
        this.size = size;
        commands = new LinkedList<>();
        redoCommands = new LinkedList<>();
    }

    public void execute(Command command) {
        redoCommands.clear();
        internalExecute(redoCommands.removeLast());
    }

    public void redo() {
        if (!redoCommands.isEmpty()) {
            internalExecute(redoCommands.removeLast());
        }
    }

    public void internalExecute(Command command) {
        if (commands.size() >= size) {
            commands.removeFirst();
        }
        commands.add(command);
        command.execute();
    }

    public void undo() {
        if (!commands.isEmpty()) {
            Command command = commands.removeLast();
            redoCommands.add(command);
            command.undo();
        }
    }
}

That’s it, folks.

Related Books

This design pattern is based on these two books, I have both ot them, I like the game programming patterns better than the original but the orignal is almost a must have a for any programmer.

ECS Pattern: Follow Entity

When I write games I have always something following something else. The camera follows a hero. Light follows ghost. Goody follows the space ship. Weapon follows the player. And so on and so on. This is a very common pattern in games.
In the object-oriented world, I would probably have a reference to the object which is "attached" to me, like the gun or lamp or whatever it is. In an entity component system I go the other way around, the attached item does have a link to the entity it has to follow. Once you have your system which makes it happen, that every item entity with a link to another entity will follow that other entity you will be able to let nearly everything follow anything else with literally one line of additional code, well most often.

Lemings

Precondition

You already know what an entity component system is if not this article EntityComponent System is Crazy Cool migth give you a clue. I do all my examples in Java, but it should easily be adaptable to whatever own language you have. Also, the ECS might differ, I use Zay-ES, but as well you can probably easily make the link to your implementation of an ECS.

Position of Your Leming

The objects which lead and those which follow need a position component to store the location and the orientation of the entity. This component is set on every frame to make the thing move around. And yes it is always a new instance, no reuse. And java seems to be smart and efficient enough not to have any issue with very short-living objects. Components do have intentionally no setter methods!

public class Position implements EntityComponent {

    private final Vec3d location;
    private final Quatd facing;

    public Position(Vec3d loc, Quatd quat) {
        this.location = loc;
        this.facing = quat;
    }

    public Vec3d getLocation() {
        return location;
    }

    public Quatd getFacing() {
        return facing;
    }

    @Override
    public String toString() {
        return "Position[location=" + location + ", facing=" + facing + "]";
    }
}

Link to Another Leming

Now the object which shall follow another object needs a follow component

public class Follow implements EntityComponent {

    private final EntityId parent;

    public Follow(EntityId parent) {
        this.parent = parent;
    }

    public EntityId getParent() {
        return parent;
    }

    @Override
    public String toString() {
        return getClass().getSimpleName() + "[parent=" + parent + "]";
    }
}

I just store the entity id I want to follow and that’s it.

I Follow You

Now we need a follow system which handles the linked entities. I will have to take care of all entities with a position and a model component and all entities with a position, link, and model component. I will call them leaders and followers.
The followers will be iterated and checked if they have a link to one of the leaders.

Set It Up

For this, I only need the entity data and two Zay-ES containers, one to hold the follers and one to hold the leaders.

public class FollowSystem extends BaseAppState {

    static Logger LOG = LoggerFactory.getLogger(FollowSystem.class);
    private EntityData ed;
    private FollowerContainer followerContainer;
    private LeaderContainer leaderContainer;

    @Override
    protected void initialize(Application app) {
        ed = main.getStateManager().getState(EntityDataState.class).getEntityData();
    }

    @Override
    protected void cleanup(Application app) {
    }

Start/Stop It

When we enable this system we instantiate and start the follower and leader container.

    @Override
    protected void onEnable() {
        followerContainer = new FollowerContainer(ed);
        followerContainer.start();
        leaderContainer = new LeaderContainer(ed);
        leaderContainer.start();
    }

    @Override
    protected void onDisable() {
        followerContainer.stop();
        followerContainer = null;
        leaderContainer.stop();
        leaderContainer = null;

Every Frame

On every frame, I update the follower and leader container to get all added, updated, and removed followers and leaders. To update all follower’s positions I simply loop over the followers, see if their leader does exist in the leader container, get the leader position, and store this position in the follower’s position.

    @Override
    public void update(float tpf) {
        followerContainer.update();
        leaderContainer.update();

        followerContainer.stream().forEach(follower -> {
            LeaderData leader = leaderContainer.getObject(follower.leader);
                        if (leader != null) {
                ed.setComponent(follower.id, new Position(leader.location));
            }
                });
    }

Leaders

The leader’s container keeps track of all the entities which do have a model and a position component, the code is very simple and straight forward.

    class LeaderData {
        Vec3d location;
    }

    class LeaderContainer extends EntityContainer<LeaderData> {
        LeaderContainer(EntityData ed) {
            super(ed, ModelType.class, Position.class);
        }

        Stream<LeaderData> stream() {
            return Arrays.stream(getArray());
        }

        @Override
        protected LeaderData addObject(Entity entity) {
            LeaderData result = new LeaderData();
            updateObject(result, entity);
            return result;
        }

        @Override
        protected void updateObject(LeaderData data, Entity entity) {
            SpawnPosition position = entity.get(Position.class);
            data.location = position.getLocation();
        }

        @Override
        protected void removeObject(LeaderData data, Entity entity) {
        }
    }

Followers

The container is even simpler, we are only interested in entities which do have a follow component and store our entity id and the leader’s entity id.

    class FollowerData {
        EntityId id;
        EntityId leader;
    }

    class FollowerContainer extends EntityContainer<FollowerData> {

        FollowerContainer(EntityData ed) {
            super(ed, Follow.class);
        }

        Stream<FollowerData> stream() {
            return Arrays.stream(getArray());
        }

        @Override
        protected FollowerData addObject(Entity entity) {
            FollowerData result = new FollowerData();
            result.id = entity.getId();
            result.leader = entity.get(Follow.class).getParent();
            return result;
        }

        @Override
        protected void updateObject(FollowerData t, Entity entity) {
        }

        @Override
        protected void removeObject(FollowerData t, Entity entity) {
        }
    }
}

Finally

You can extend this with an offset as at the moment the follower and the leader will have the same position, which might not be wished as you probably want to have the lamp, weapon, or tool in front of your character and not on the very same position. As well you could implement a smoothing when following something.

Thanks for reading. If you have questions, suggestions, or an oppinions leave a comment below.

ECS Pattern: Decay

This blog post is based on Entity Component System are Crazy Cool.
There are so many things in-game that have a lifetime. Bullets, effects, debris, blood, vanishing tiles in a can’t stop running-game, and many more things which have a lifetime.
In the past, I would have done it separately depending on which situation something hast to vanish. With the entity component system you can solve all of them with one component and one system. The decay component and decay system.

I use jMonkeyEngine with Zay-ES written in Java.

Component

Bullets, debris, blood are represented by entities with a certain set of components in our game world. A bullet entity for example has a model component, a position component, and a damage component. For the decay system, we need a decay component we can attach to those entities to make them disappear after a while. Instead of detecting where the bullet is, you simply remove the bullet after a while if it didn’t hit something. No need to detect where the bullet is right now, just remove it after let’s say a second.

public class Decay implements EntityComponent {

    public long timeout;

    public Decay(long timeoutMs) {
        this.timeout = timeoutMs;
    }

    public long getTimeoutMs() {
        return timeout;
    }

    @Override
    public String toString() {
        return getClass().getSimpleName() + "[" + timeout + " ms" + "]";
    }
}

On creation, you define the timeout for the decay component. The timeout in ms does define how long the entity shall live.

System

The decay system does the calculation if the entity’s lifetime has been reached. It doesn’t matter if it is a bullet, an effect, debris, or even the space station. And that is the shiny beauty of an entity component system. You can give something a lifetime in your game at any time. You can decide to add a lifetime to something even very late in the development process. You can decide this a day before you launch the game as it is simply a one-liner by adding a decay component to that entity. No refactoring or code moving involved at all.

Skeleton

Let’s start with a very basic system and set up everything we need, like the entity data and the decay container.

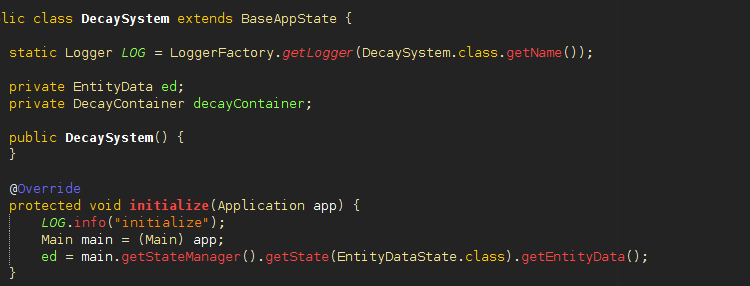
public class DecaySystem extends BaseAppState {

    private EntityData ed;
    private DecayContainer decayContainer;

    public DecaySystem() {
    }

    @Override
    protected void initialize(Application app) {
        Main main = (Main) app;
        ed = main.getStateManager().getState(EntityDataState.class).getEntityData();
    }

    @Override
    protected void cleanup(Application app) {
    }

    @Override
    protected void onEnable() {
        decayContainer = new DecayContainer();
        decayContainer.start();
    }

    @Override
    protected void onDisable() {
        decayContainer.stop();
        decayContainer = null;
    }

    @Override
    public void update(float tpf) {
            decayContainer.update();
        }

    private class DecayData {
    }

    private class DecayContainer extends EntityContainer<DecayData> {

        DecayContainer() {
            super(ed, Decay.class);
        }

        Stream<DecayData> stream() {
            return Arrays.stream(getArray());
        }

        @Override
        protected DecayData addObject(Entity entity) {
            DecayData data = new DecayData();
            return data;
        }

        @Override
        protected void updateObject(DecayData data, Entity entity) {
        }

        @Override
        protected void removeObject(DecayData data, Entity entity) {
        }
    }
}

It does nothing yet. We will now fill in the needed code. Which is not really a lot. Very simple.

Decay Entity Container

Let’s begin with the Zay-ES entity container to get all the added, removed, and updated entities with a decay component attached. In the addObject() method we create our local decay data to handle the timeout. I almost always have a local data representation with some additional logic. We store the entity id and the timeout in milliseconds. That’s it.
You can add as well logic for the updateObject() method to be able to update the decay of an entity during your gameplay, think of a plant that got some water or fertilizer or tool which got repaired.

    private class DecayContainer extends EntityContainer<DecayData> {

        DecayContainer() {
            super(ed, Decay.class);
        }

        Stream<DecayData> stream() {
            return Arrays.stream(getArray());
        }

        @Override
        protected DecayData addObject(Entity entity) {
            long timeoutMs = entity.get(Decay.class).getTimeoutMs;
            DecayData data = new DecayData(entity.getId(), timeoutMs);
            return data;
        }

        @Override
        protected void updateObject(DecayData data, Entity entity) {
                }

        @Override
        protected void removeObject(DecayData data, Entity entity) {
        }
    }

Local Decay Data

The local decay data class handles the timeout. We store the start time and the timeout and with getPercent() method we return the decay as a value 0 (no decay) and 1 (fully decayed). Very simple logic.

    private class DecayData {

        EntityId id;
        private long start;
        public long timeout;

        DecayData(EntityId eId, long timoutMs) {
            this.id = entity.getId();
            this.start = System.nanoTime();
            this.timeout = timeoutMs * 1000000;
        }

        double getPercent() {
            long time = System.nanoTime();
            return (double) (time - start) / timeout;
        }
    }

Update

And finally, in the update method, we loop over all decay data and remove those which are fully decayed.

    @Override
    public void update(float tpf) {
        decayContainer.update();
        decayContainer.stream().forEach(e -> {
            if (e.getPercent() >= 1.0) {
                    ed.removeEntity(e.id);
            }
        });
    }

Additionally

You can implement as well visualization systems to make the decay of a thing like a plant or a tool visible and give feedback to the player.

The End

That’s it. Thanks for reading. If you have suggestions or questions just write a comment below.